Contents
Introduction
Create 2 is an affordable STEM resource for educators, students and developers. Use Create to grasp the fundamentals of robotics, computer science and engineering. Ready to get hacking?
Equipment
What you will need to use this extension:
- The iRobot Create 2 Programmable Robot
- The Communication Cable for The Create 2 (Comes with the Create 2 Robot)
Getting Started
Now that you have the hardware, follow these few steps and you'll be controlling a robot in no time!- Install the latest version of Adobe flash
- Install the 32 bit ESR version of Firefox. This is the only browser that works with the Scratch plugin
- Install the Scratch Extension Browser Plugin
- Connect the Communication Cable to the Create 2 robot and your computer.
- Note: It may take a minute for the drivers to install the first time you connect the cable.
- Make sure the robot is on (indicated by the Clean button LED). If it is not, press the button once to turn it on.
- Note: If the Clean button LED is red, the robot needs to be charged.
- Load the Create 2 extension on ScratchX
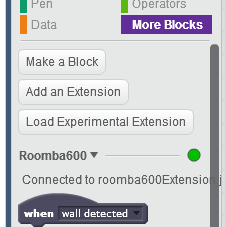 |
When you see the indicator light in the More Blocks tab turn green you're ready to robot! | |
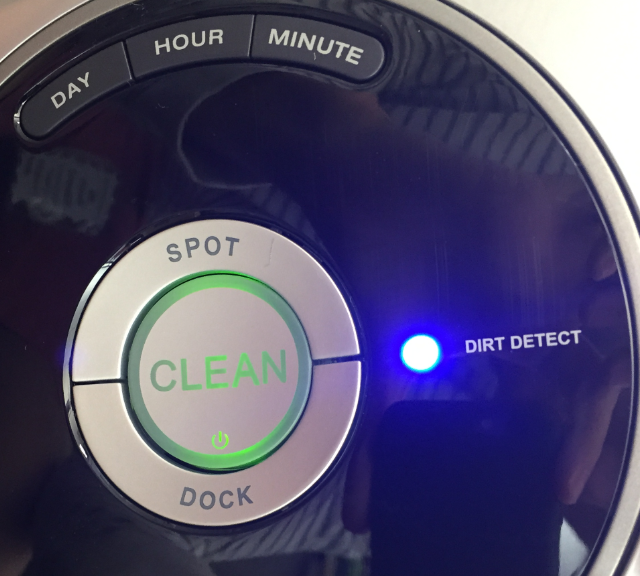 |
The blue Dirt Detectlight should also be on to indicate the robot is ready as well. |
At this point you are ready to start programming with the Scratch Blocks below. Use these Example Projects and Sensor Diagrams to help you get started.
Scratch Blocks
Here is a short description of each of the blocks included in this extension:
|
| 
|
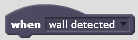
Runs when the selected robot sensor is triggered. The selectable sensors include wall and cliff detection. |
|
| |
 |
Runs when the selected robot button or bumper is pressed. |
|
| |
 |
Checks if the selected robot sensor is triggered. The selectable sensors include wall and cliff detection. |
|
| |
 |
Checks if the selected robot button or bumper is pressed. |
|
| |

|
Sets the tempo in beats per minute that the robot will play notes sent by the Play Note Block at. |
|
| |
 |
Plays the selected note for the selected beats through the robot speaker at the tempo selected in the Set Tempo block. If you click the down arrow next to the note number, it will drop a piano roll down to make note selection easier. |
|
| |

|
Sets the speed the robot will drive at. The valid range for the drive speed is between 0% (stopped) and 100% (full speed). The default speed is 100%. Note: The robot will not drive until one of the drive blocks below is sent. |
|
| |
 |
Drives the robot at the most recently selected drive speed from the Set Drive Speed Block. |
|
| |
 |
Drives the robot at the most recently selected drive speed from the Set Drive Speed Block for the given distance. The distance must be between -1500 and 1500 cm. Note: A negative distance will drive the robot backwards and a positive distance forward. |
|
| |
 |
Turns the robot in place counter-clockwise the given number of degrees. The degrees must be between 0 and 360 (one full rotation). |
|
| |
 |
Turns the robot in place clockwise the given number of degrees. The degrees must be between 0 and 360 (one full rotation). |
|
| |
 |
Stops the robot from moving. This includes driving forward and turning. |
|
| |
 |
Turns the selected robot LED on or off. |
|
| |
 |
Displays the 4 digits on the robot display. Each digit must be a single character. |
|
| |
 |
Set the brightness of the Clean button LED. The brightness must be between 0 (off) and 100% (full). |
|
| |
 |
Set the color of the Clean button LED. |
|
| |
 |
Start a robot docking mission. The 'leave' dock mission must be run to safely drive the robot off the dock. The 'go to' dock mission should only be run if the robot is near the charging dock. Please be aware that this may cause the robot to drive away from your computer and pull or damage the Communication Cable. |
|
| |
Example Projects
- Tethered Driving
- Drive in a square
- Play a song
- Display Characters and Blink LEDs
- Zoom Clean Button LED
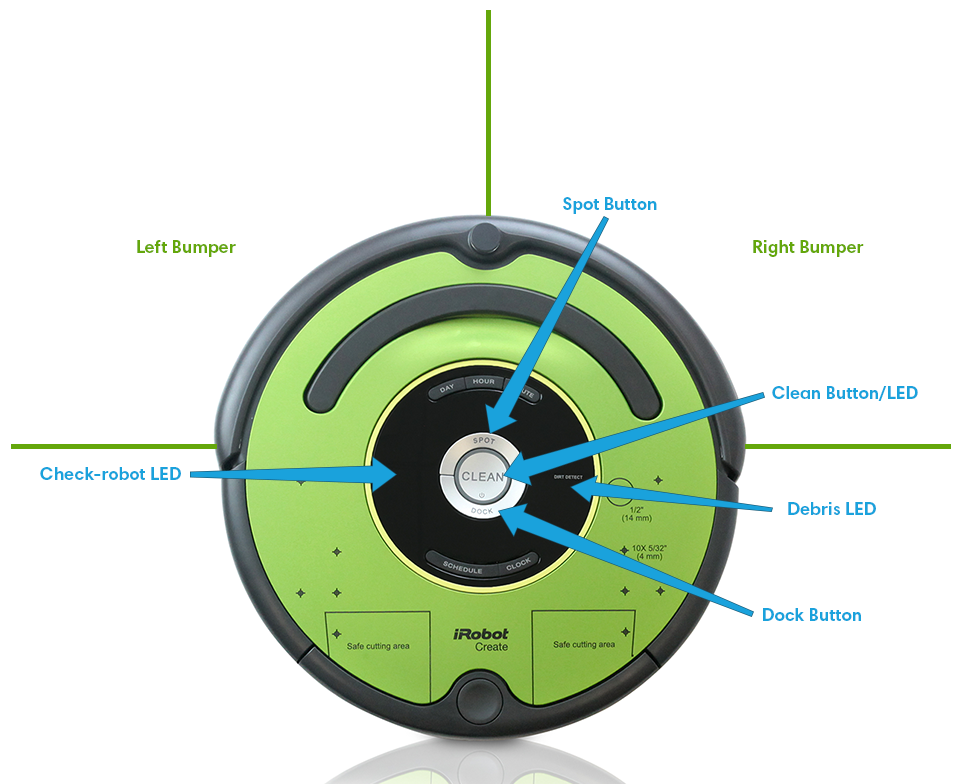
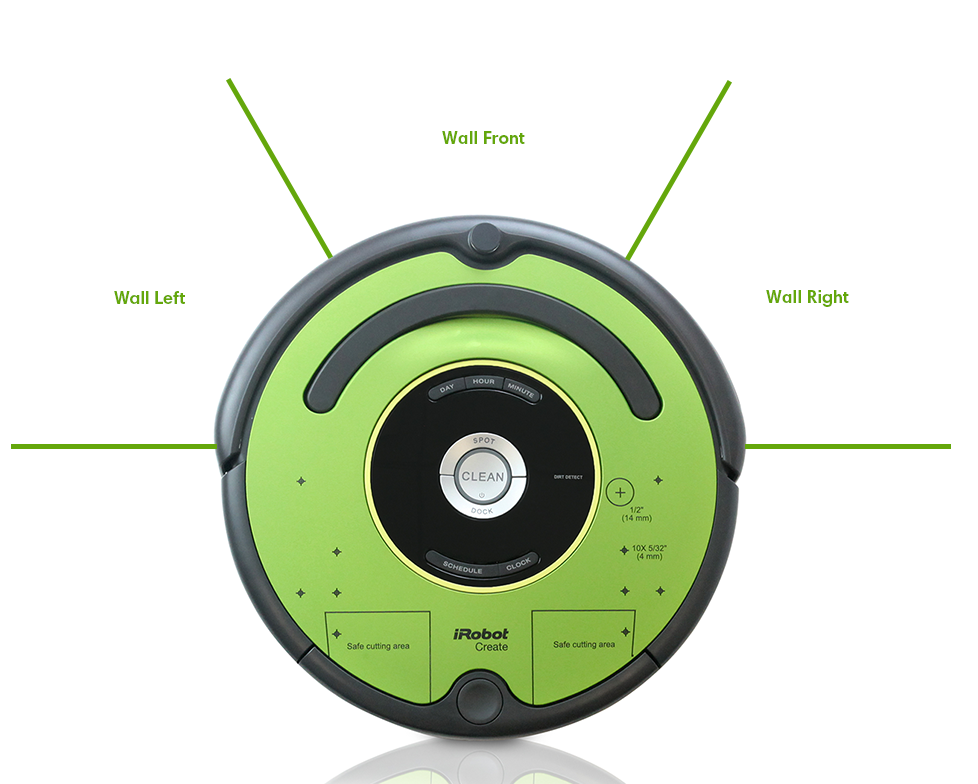
Sensors
Below are diagrams of where the sensors and LEDs included in the Create 2 Scratch Extension are located on the robot. Blue indicates buttons and LEDs. Green indicates other sensors, such as bumper presses and wall detection.
Troubleshooting
If you run into issues controlling the Create 2 robot using Scratch, here's a few items to check to make sure your setup is correct and the robot is ready:- Make sure you are using the 32 bit ESR version of Firefox. This is the only supported browser for Scratch. Note that the 64 bit ESR version does not work with the scratch plugin. See https://support.mozilla.org/en-US/kb/npapi-plugins
- Make sure the latest version of Adobe flash is installed. Older versions can be incompatible with Scratch.
- Make sure the robot is fully charged (indicated by a the Clean button LED being green).
- If it is not charged, the robot may experience communication issues which can result in the blocks not performing the desired functionality.
- Make sure the Communication Cable is fully connected.
- It's possible that the cable may come loose while driving the robot around. If this happens, then the robot will no longer be able to receive commands from Scratch
- Make sure the robot is turned on
- If the robot is turned off when you open the extension in Scratch, it will not be able to connect to the robot and the indicator light in Scratch will not turn green. To prevent this from happening, turn the robot on before opening Scratch. After the robot is on (indicated by the Clean button LED being green), you can then open the extension in Scratch
- Make sure your browser is not blocking the Scratch Browser Plugin
- If all else fails, reset the robot and browser and try again
- Sometimes the robot may get out of sync with Scratch. If none of the above steps worked, starting fresh may solve the problem. To reset the robot, hold the Spot and Dock buttons at the same time for 10 seconds or take the battery out and replace it. After the robot resets, turn it on and then open the extension in Scratch again.